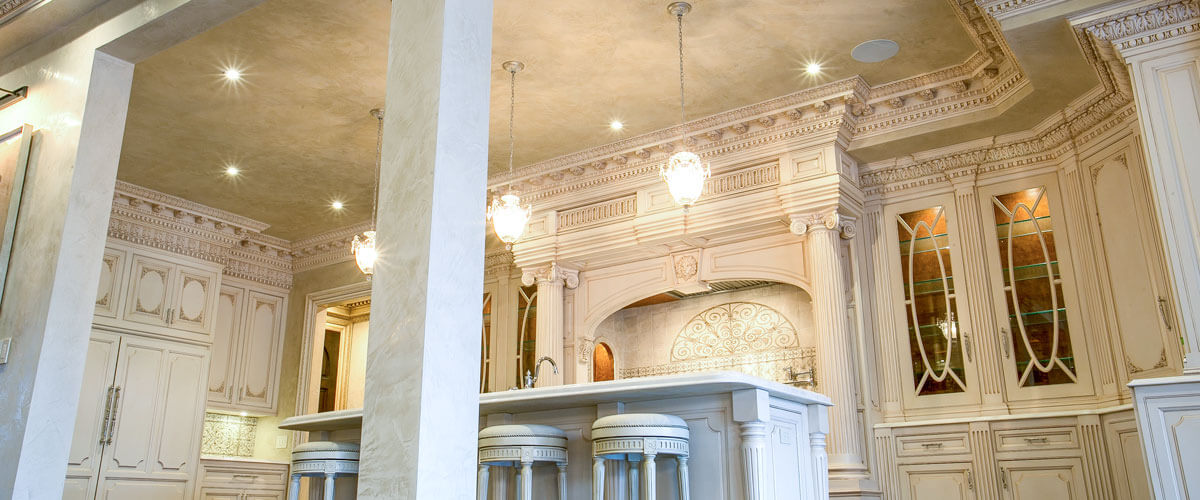
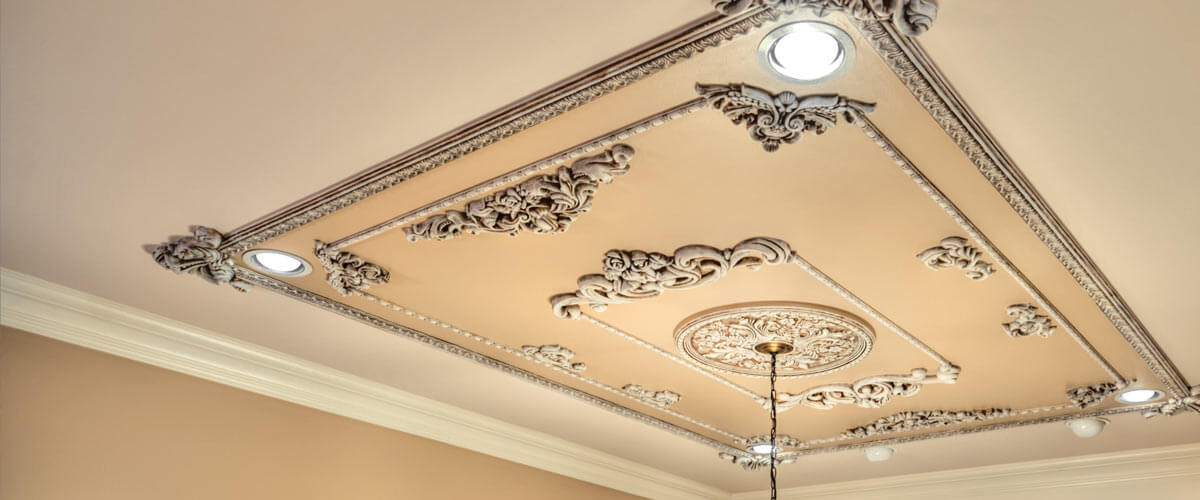
- Crown Molding
Installation of crown molding may seem like a daunting task, but with a little guidance and little practice just about anyone can do a praiseworthy job installing our crown molding. These videos will cover the basics of cutting and installing crown molding.
These videos demonstrate our unique way of cutting crown molding. We do not suggest that this is the very best way to do this, but for a first timer, this method makes it a little easier to visualize the corners and cuts needed to finish your project.
While many of the methods in these videos apply to crown molding projects using other materials, the process used in the video is specifically designed for installing polyurethane crown molding. The crown molding installed in this video is uDecor polyurethane crown molding. If you have a different method that you are comfortable with, then by all means use it.
In this video Eric installs a crown molding project from start to finish. This project has inside & outside 90 degree corners, 135 degree corners and he shows you ways to deal with bull nose corners. A great video to watch to give you an overall idea on what to expect in a typical crown molding install.
A great video for learning the basics of an inside 90 degree crown molding corner. This step by step guide is prefect for the DIYer in all of us.
Sometimes the walls go a different direction. A outside 90 degree corner is much like an inside 90 degree corner. But different. This video will set you in the right direction.
Corners that are not your typical 90 degrees can be a little confusing at first. In this DIY video Eric takes some of the mystery out of dealing with these corners, a 135 degree inside corner in this case.
And for every weird inside angle, there is most likely a opposite angle. This is a step by step guide for a 135 degree outside corner.
How do you stop crown molding? You don't want to leave a open edge just floating out there on the wall. What if my vent or window is in the way of the molding? This video shows you a pro trick.
Written Instructions
Getting Started
Installation of crown molding may seem like a daunting task, but with a little guidance and very little practice just about anyone can do a praiseworthy job installing crown molding. This guide will cover the basics of cutting and installing crown molding. As with any task, there are various ways to cut and install crown molding and if you have a different method that you are comfortable with, then by all means use it. You use our products in much the same way as you would other crown moldings on the market.
These videos demonstrate our unique way of cutting crown molding. We do not suggest that this is the very best way to do this, but for a first timer, this method makes it a little easier to visualize the corners and cuts needed to finish your project.
Material & Tools Needed
Hammer / Finish Nails / Nail Set / Brad Gun
Miter Saw / Miter Box
Adhesive / Caulking Gun
Tape Measure / Pencil
Angle Finder / Protractor
Caulking (paintable latex)
Sandpaper- Medium Grit
Utility Knife
Mineral Spirits / Rag
Paint / Paint Brush
Measuring
When installing, you will notice that on an inside corner the bottom of the molding will go all the way into the corner while the top of the molding will be several inches out from the corner. Similarly, on an outside corner it is the bottom of the molding that comes even with the corner while the top of the molding extends out beyond the corner. For this reason, when you take a measurement along the wall to determine how long the piece needs to be, you should always mark the molding on the bottom edge and make your cut using that mark. If you mark the molding on the top, your piece will not be the correct length.
Painting
Your molding comes pre-primed and ready for paint. As with any product, test your paint on a small area to make sure there are no incompatibility issues with the paint and pre-applied primer. Most home latex paints work great. We do not recommend combo paints that have primer and paint all in one coat. There have been reports of these paints not drying and staying tacky. Test a spot before you commit.
As with any millwork products, some prep work such as light sanding may be necessary.
ProTip
It is easier to paint the molding before installation. Working at waist level is always better than working over your head. Paint your molding before you start the installation process. Then touch up the imperfections after you are done with the install.
Corner Types
There are two types of corners that we will be referencing - inside and outside corners. Take a look at the image to the right to identify the different corner types.
We'll also be referring to the corner pieces as a left or right corner piece. They are referenced by what side they would be on when installed.
Angles other than 90 Degree
Most rooms consist of four 90 degree corners. That's why most of our cuts are at 45 degrees, because half of 90 is 45. Very rarely do homes have corners that are truly a 90 degree angle. If you use an angle finder you will be surprised that you may have 88 to 92 degree corners. Sometimes less or more! But don't worry, there's nothing wrong with your house, it's just the nature of construction and the materials used. While cutting your corners at 45 degrees will usually yield perfectly acceptable results, using an angle finder will produce the perfect corner.
When using an angle finder, subtract your reading from 180 and then divide by 2 to get the cut angle. If I have 2 walls that come together at an angle, and my angle finder tells me it's 135 degrees, I subtract 135 from 180. That gives me 45. Half of 45 is 22.5. That would be my cut angle for each side of an inside corner.
180 Minus the Angle Reading = X
X Divided by 2 = Cut angle for a inside or outside corner
Whether you have a 90 degree corner or some other angle, the cutting process is the same. The only change you will need to make is the miter angle of your saw.
INSTALLATION
Where to Start
When installing a crown molding that has a design you can make the design line up well in every corner except the point where your last piece of molding meets with the first piece. For this reason, start in the least visible corner and work your way around the room to finish back in that least visible corner. For plain molding, the ending point is not important so you can start in whichever part of the room you feel most comfortable.
Securing The Molding to the Wall
Before mounting the molding to the wall, apply a 1/4" bead of polyurethane adhesive to the top and bottom of the molding where it will contact the ceiling and wall. When you are joining moldings together make sure to apply adhesive between the touching sides of the molding. This will insure that your molding joints will not separate as the house expands and contracts. Use mineral spirits and a rag to clean up any drips.
Use small finishing nails or a powered brad gun to secure the molding while the adhesive sets. Make sure to use a nail punch to sink your finish nails below the surface. If you are using a powered brad gun, adjust the power so that the gun drives the brads just below the molding surface.
Don't force the molding to conform to the unevenness of the wall. No wall is perfectly straight and by forcing the molding to conform you will highlight the walls condition. Let the molding run naturally straight and use painter's caulk to fill up any holes or gaps.
USE ADHESIVE!
It is necessary to use adhesive between the joints of the molding. This prevents the molding from separating at the joints when the house walls expand and contract.
Last Piece on a Wall
The absolute best way to combat molding from pulling apart is to "snap" the last piece in. The last piece should be cut too long for the space. How much longer the last piece should be cut is a matter of over all length and molding size. For runs around 8 feet, start with 1/2" longer than necessary. Shorter runs usually require less than a 1/4". Test fit the piece by placing the ends in place, then pushing the middle are to the wall. If it "snaps" into place, check to make sure it is laying flat to the wall without buckling. Shorten the piece as needed until it "snaps" into place without causing any buckling along the run. Pull the piece back down, apply your adhesive to the back and ends, place and nail the ends into place, then push the middle are into place until it "snaps" in. Use brad nails as required.
When two pieces of molding are being joined together in a run end to end, leave the last two feet of the open end of the installed molding loose so you can have some alignment room when you join the next piece unless it is the last piece.
Our Cutting Method
The method of cutting crown molding below is a little unique to us. We are aware that there are many different approaches to cutting corners for crown molding. If you are an experienced installer, please feel free to employ whatever method you are comfortable with. The method below is to provide easy reference and maximise the cutting breadth of the chop saw for less experienced DIYers while rendering acceptable results.
Cutting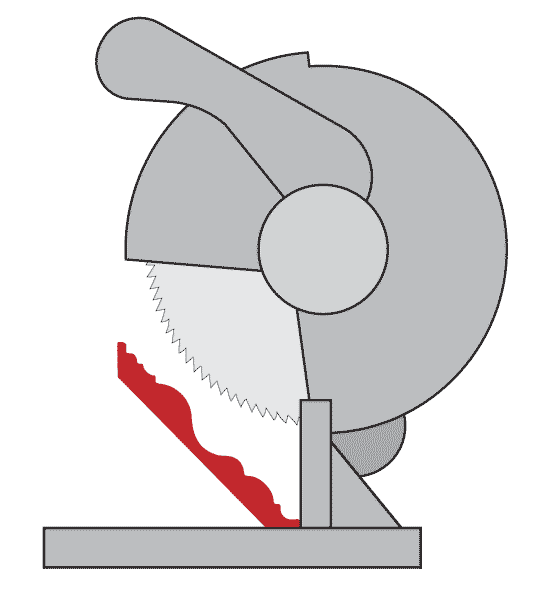
If installing using the method below, you only need a standard miter saw. If you are using a compound miter saw you will not need to use the bevel feature.
Imagine that the base of the saw is your ceiling and put the edge of the molding that will touch the ceiling flat against the base of the saw pressed up against the fence. The edge of the molding that will touch the wall should be facing away from the fence if you have it in the correct position.
While holding the molding at the correct angle, align the blade with your measurement and make your cut. If in doubt, cut the molding a little long. You can always go back and shave a little off the end.
90 Degree Inside Corners
Inside Corner-Left Piece - When you are at your miter saw have the long part of the molding extend out to the left. Move the saw angle to your right to the 45 degree mark for a 90 degree corner or your calculated angle for an angled corner. Make sure the top of the molding is on the saw deck and the bottom is facing you. Hold the molding at the correct angle and make your cut.

Inside Corner-Right Piece - When you are at your miter saw have the long part of the molding extend out to the right. Move the saw angle to your left to the 45 degree mark for a 90 degree corner or your calculated angle for an angled corner. Make sure the top of the molding is on the saw deck and the bottom is facing you. Hold the molding at the correct angle and make your cut.
90 Degree Outside Corners

Outside Corner-Left Piece - When you are at your miter saw have the long part of the molding extend out to the left. Move the saw angle to your left to the 45 degree mark for a 90 degree corner or your calculated angle for an angled corner. Make sure the top of the molding is on the saw deck and the bottom is facing you. Hold the molding at the correct angle and make your cut.

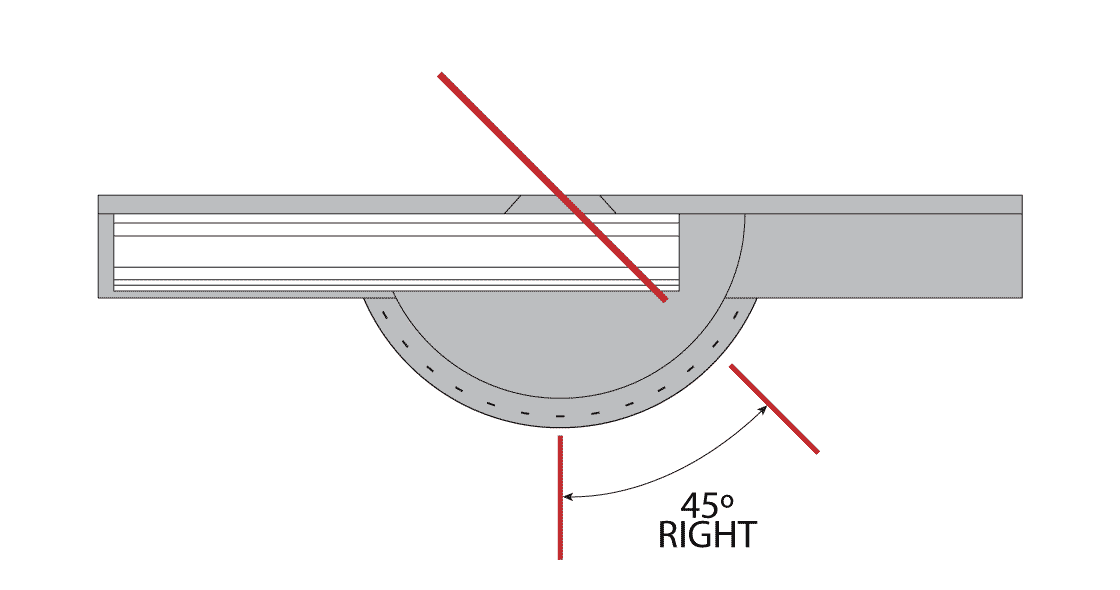
Outside Corner-Right Piece - When you are at your miter saw have the long part of the molding extend out to the right. Move the saw angle to your right to the 45 degree mark for a 90 degree corner or your calculated angle for an angled corner. Make sure the top of the molding is on the saw deck and the bottom is facing you. Hold the molding at the correct angle and make your cut.
Installing A Return
Most moldings will go around the whole room but sometimes we want the molding to just end. An elegant way of doing that is to create a return. Cut an outside corner on the long piece and one on a small piece of scrap (that is opposite your long piece cut). Then make a straight cut that is lined up with the bottom point of your short piece.
Installing Around A Bullnose Corner
It looks more professional to create a transition piece for going around a bull-nose corner. On 90 degree corners the miter angle is set to 22.5 degrees for all the corners. The transition piece should be pie shaped with the length of the base of the piece equal to 83% of the size of the radius of the bull-nose. For a standard 3/4" bull-nose the bottom of the molding should be 5/8".
Bottom Measurement of fill piece;
1-1/2" Radius Corner = 1-1/4"
3/4" Radius Corner = 5/8"
3/8" Radius Corner = 5/16"
Finishing Up
Now that you have all of your molding installed, spend a little time with some latex painter's caulk and fill in all those little seams and nail holes. Run a bead of caulk around the entire job to make it look nice and neat. Latex painter's caulk cleans up with water and is very easy to smooth out with your finger.
90 Degree Inside Corners
Inside Corner-Left Piece - When you are at your miter saw have the long part of the molding extend out to the left. Move the saw angle to your right to the 45 degree mark for a 90 degree corner or your calculated angle for an angled corner. Make sure the top of the molding is on the saw deck and the bottom is facing you. Hold the molding at the correct angle and make your cut.
Inside Corner-Right Piece - When you are at your miter saw have the long part of the molding extend out to the right. Move the saw angle to your left to the 45 degree mark for a 90 degree corner or your calculated angle for an angled corner. Make sure the top of the molding is on the saw deck and the bottom is facing you. Hold the molding at the correct angle and make your cut.
90 Degree Outside Corners
Outside Corner-Left Piece - When you are at your miter saw have the long part of the molding extend out to the left. Move the saw angle to your left to the 45 degree mark for a 90 degree corner or your calculated angle for an angled corner. Make sure the top of the molding is on the saw deck and the bottom is facing you. Hold the molding at the correct angle and make your cut.
Outside Corner-Right Piece - When you are at your miter saw have the long part of the molding extend out to the right. Move the saw angle to your right to the 45 degree mark for a 90 degree corner or your calculated angle for an angled corner. Make sure the top of the molding is on the saw deck and the bottom is facing you. Hold the molding at the correct angle and make your cut.
Angles other than 90 Degree
Most rooms consist of four 90 degree corners. That's why most of our cuts are at 45 degrees, because half of 90 is 45. Very rarely do homes have corners that are truly a 90 degree angle. If you use an angle finder you will be surprised that you may have 88 to 92 degree corners. Sometimes less or more! But don't worry, there's nothing wrong with your house, it's just the nature of construction and the materials used. While cutting your corners at 45 degrees will usually yield perfectly acceptable results, using an angle finder will produce the perfect corner.
When using an angle finder, subtract your reading from 180 and then divide by 2 to get the cut angle. If I have 2 walls that come together at an angle, and my angle finder tells me it's 135 degrees, I subtract 135 from 180. That gives me 45. Half of 45 is 22.5. That would be my cut angle for each side of an inside corner.
180 Minus the Angle Reading = X
X Divided by 2 = Cut angle for a inside or outside corner
Whether you have a 90 degree corner or some other angle, the cutting process is the same. The only change you will need to make is the miter angle of your saw.
Installing A Return
Most moldings will go around the whole room but sometimes we want the molding to just end. An elegant way of doing that is to create a return. Cut an outside corner on the long piece and one on a small piece of scrap (that is opposite your long piece cut). Then make a straight cut that is lined up with the bottom point of your short piece.
Need More Help?
Let us know what we can help you with. We've been doing this for quite a long time and we'd love to help you in any way we can.
By Phone
Our friendly staff members are happy to help you through the purchasing and installation experience.
Call us toll-free:
1 (877) 550-0600
Store Hours Monday - Friday
8:00AM-7:30PM EST
(5:00AM-4:30PM PST)
By Chat
Instant message with one of our helpful staff members. Get instant answers without touching your phone.
Live Chat - Monday - Friday
8:00AM-7:30PM EST
(5:00AM-4:30PM PST)

By Email
Email is an awesome way to communicate. You can send us pictures to help describe what you need help with. We love it because it gives us the opportunity to make sure we get you the help you
Email us at sales@udecor.com
We usually respond within 1 business day unless you have a really complicated question. Then we pass your email around to make sure we give you the best solution.
DIY Topics
Explore Creative Ideas